How to add a transition between videos or images on the timeline
Video transitions are important for any kind or size of video these days. Transitions help in connecting two scenes together, building better engagement, and seasoning your storyboard. You can also use transitions to help your video story progress smoothly, provide clarity to the viewer, and add depth to the storyline.
Creating videos with transitions on Typito is simple - whether you’re adding transitions to a video for a larger-than-life billboard advertisement, a vertical banner ad, or the smallest display ad on a website.
Let us walk you through the steps to easily create videos with beautiful transitions:
Step 1: Upload your clips to a new project
Create a new video project and add your images and video clips. Your clips will appear on the video timeline like this:

Step 2: Select a Clip
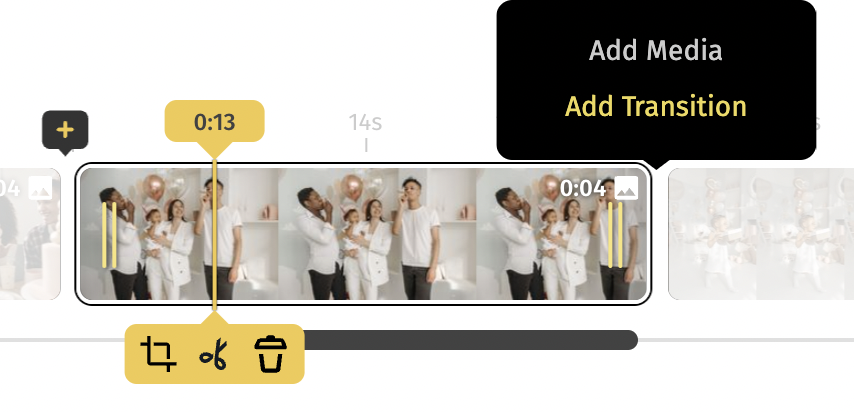
Click on the clip to select it. You will notice the add icon indicated by “+” between clips. Click the icon and select Transition from the drop-down menu.
Step 3: Choose a transition.

Next, choose from the different types of transitions that you can apply. The transition you choose will be applied instantly between the two clips. Play your video to preview the transition you’ve just added.
Note: You can change transitions for each pair of clips. This gives you the freedom to have multiple transition styles for different clips across your video project.
Let’s quickly understand the transition styles you can apply:
Fade to black: Perhaps the most popular transition style used in videos across social media videos, television, and news. The fade denotes a change in time and/or location between scenes.
2. Cross-fade: A gradual, continuous fade from one clip to the next (it is also called ‘cross dissolve’).
That’s it. Ready to add transitions and increase the impact of your videos?
Still, have questions? Send a message to hello@typito.com or use the chat support functionality in the app, and we’ll get right back to you.